Summary
Black mold is a serious health hazard that thrives in moisture-rich environments and can cause respiratory issues, skin irritation, and other health problems. Professionals handle mold removal through a systematic process: first identifying and assessing affected areas, then containing the space to prevent spore spread, removing heavily contaminated materials like drywall or carpets, and cleaning remaining surfaces with HEPA vacuums and antimicrobial solutions. Thorough drying using industrial fans and dehumidifiers prevents recurrence, while preventive measures such as fixing leaks, improving ventilation, using mold-resistant materials, and maintaining low indoor humidity help stop future growth. Professional intervention is especially important for large infestations, hidden mold, or when health risks and structural damage are involved.
–
Introduction
Black mold is more than just an unsightly stain on walls or ceilings it’s a serious health hazard. Exposure can lead to respiratory issues, allergic reactions, and other long-term health problems. That’s why addressing black mold quickly and effectively is crucial for any homeowner or office manager.
In this blog, we’ll explore the proven methods professionals use to remove black mold, helping you understand the process and why professional intervention is the safest approach often.
Understanding Black Mold
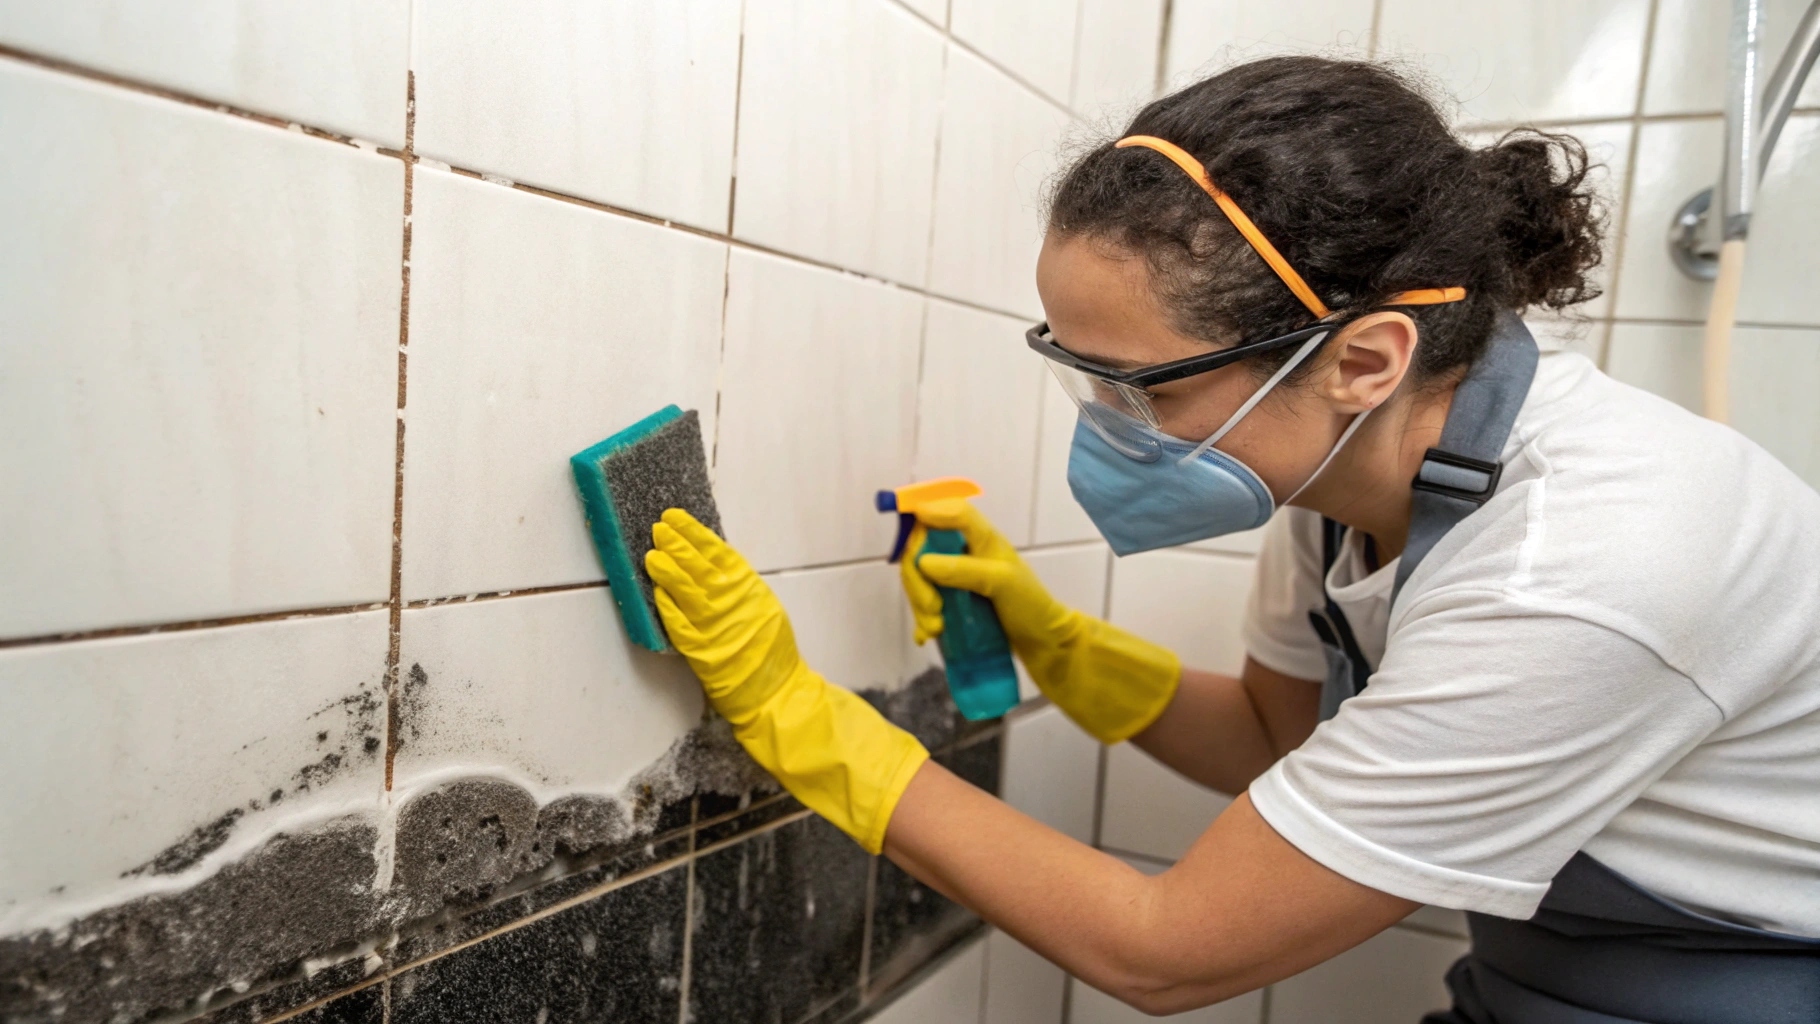
Understanding black mold is crucial for maintaining a safe and healthy living or working environment. This type of mold, scientifically known as Stachybotrys chartarum, thrives in damp, moisture-rich areas such as leaky roofs, bathrooms, or water-damaged walls. Its dark green or black appearance often signals a hidden problem that can release harmful spores into the air, causing respiratory issues, headaches, and skin irritation. When it comes to cleaning black mold, it’s important to approach the task carefully, as disturbing it without proper precautions can spread spores and worsen contamination. Knowing where and how black mold grows helps homeowners and professionals take effective measures to remove it safely and prevent future outbreaks.
Step 1: Identify and Assess the Mold
Professionals begin by carefully inspecting the affected areas. This usually includes:
- Visual Inspection: Identifying visible black mold patches on walls, ceilings, carpets, and HVAC systems.
- Moisture Detection: Using tools like moisture meters to find hidden mold behind walls or under floors.
- Air Quality Testing: Detecting airborne spores to assess the extent of contamination.
Pro Tip: Never disturb mold without protective gear, as spores can spread easily.
Step 2: Contain the Area
Containment is critical to prevent spores from spreading. Professionals typically use:
- Plastic Sheeting: To seal off contaminated rooms
- Negative Air Pressure Machines: To ensure air flows out of the contaminated area
- Protective Gear: Masks, gloves, and full-body suits
Proper containment ensures that the mold removal process doesn’t make the problem worse.
Step 3: Remove Contaminated Materials
Some materials are difficult to clean and are often removed entirely:
- Drywall and Insulation: Usually discarded if heavily infested
- Carpets and Upholstery: Moldy sections are replaced
- Ceiling Tiles and Wood Panels: Removed if contaminated
Professionals are trained to dispose of these materials safely, following local regulations to prevent environmental contamination.
Step 4: Clean and Treat Surfaces
After removing contaminated materials, professionals clean the remaining surfaces using proven methods:
- HEPA Vacuuming: High-Efficiency Particulate Air (HEPA) vacuums remove fine mold spores from surfaces.
- Antimicrobial Solutions: Surfaces are treated with specialized cleaning agents that kill mold and prevent regrowth.
- Scrubbing and Washing: Non-porous surfaces are scrubbed to eliminate mold residues completely.
Tip: Household bleach is not recommended for porous surfaces because it may not reach mold roots.
Step 5: Dry the Area Thoroughly
Mold thrives in moisture. Professionals ensure that all affected areas are dried completely using:
- Industrial Fans and Dehumidifiers
- Moisture Monitoring Equipment
A thorough drying process prevents mold from returning, which is often the most overlooked step in DIY cleanup.
Step 6: Prevent Future Mold Growth
Professional mold remediation doesn’t stop cleaning. Prevention strategies include:
- Fixing Leaks Promptly: Roof, plumbing, and window leaks are repaired.
- Improving Ventilation: Ensuring proper airflow in bathrooms, kitchens, and basements.
- Using Mold-Resistant Materials: Paints, drywall, and insulation designed to resist mold.
- Maintaining Humidity Levels: Keeping indoor humidity below 50%.
Preventive measures are key to keeping your home or office mold-free in the long term.
When to Call a Professional
While small patches of mold may be managed with DIY solutions, professional help is necessary if:
- Mold covers an area larger than 10 square feet
- Mold is hidden behind walls or under floors
- You experience health symptoms from exposure
- The building has structural damage
Professionals not only remove mold safely but also ensure the environment is restored to a healthy state.
Final thought
When dealing with black mold, taking immediate and careful action is essential to protect both health and property. Professionals follow a structured approach to clean black mold, including identifying affected areas, containing the space, safely removing contaminated materials, and treating surfaces to prevent regrowth. Proper drying and preventive measures, such as fixing leaks and improving ventilation, ensure that mold does not return. Relying on expert methods guarantees a thorough, safe, and lasting solution for homes and offices.